 Skip to content
Unlock the power of kitchen‑cupboard ingredients to transform dull, damaged hair into glossy, healthy locks. A homemade hair mask nourishes, strengthens, and revitalizes strands without harsh chemicals or salon prices.
You’ll learn how to quickly create, apply, and customize a hair mask based on your hair’s needs, as well as pro tips for maximizing results. Ready to give your hair the pampering it craves? Let’s get started!
What Are the Benefits of Using a Homemade Hair Mask?
Homemade hair masks pack your strands with real‑food nutrients—think vitamins, healthy fats, and proteins—while costing just $0.30–$1.00 per treatment. They outperform store brands in hydration, repair split ends, reduce breakage, and let you customize formulas without any harsh chemicals.
- Deep, Targeted Nutrition
- Pure, bioavailable ingredients (e.g., avocado’s oleic acid, egg yolk keratin) penetrate the hair shaft—not just coat the surface.
- Protein reinforcement: Coconut oil’s lauric acid can cut protein loss by up to 50%, making hair visibly stronger over time.
- Significant Cost Savings
- Pantry staples (coconut oil, yogurt, honey) average $0.30–$1.00 per mask versus $3–$6 for mass‑market masks and $20–$50 for salon treatments.
- Monthly savings: Using a DIY mask twice a week can save you $20–$80 each month.
- Eco‑Friendly & Sustainable
- Reusable glass jars and compostable scraps reduce plastic waste by up to 80% compared to single‑use mask sachets.
- Leftover avocado skins or banana peels can go straight into your compost bin—zero waste!
- Fully Customizable for Your Hair
- Tweak each batch to tackle dryness, frizz, thinning, or scalp sensitivity.
- Swap or adjust ingredients based on season, hair porosity, or specific concerns—no one‑size‑fits‑all formula.
- Chemical‑Free & Scalp‑Safe
- No sulfates, parabens, silicones, or artificial fragrances—ideal for sensitive scalps and color‑treated hair.
- Gentle, natural pH (around 4.5–6.5) helps close the cuticle and lock in shine without stripping your strands.
| Benefit | What’s Happening Under the Hood | Typical Impact |
|---|---|---|
| Nutrition | Vitamins A, E, B₅ from avocado & egg yolk | +50% less protein loss |
| Cost Savings | Pantry staples vs. store‑bought/salon prices | Save $20–$80/month |
| Sustainability | Glass jars & compostable scraps | –80% plastic waste |
| Customization | Ingredient swaps for every hair need | Perfectly tailored results |
| Chemical‑Free | No harsh surfactants or silicones | Gentler on scalp & color retention |
By choosing a homemade hair mask, you’re not just pampering your locks—you’re investing in healthier hair, a happier planet, and a fuller wallet.
Which Natural Ingredients Yield the Best Results in a DIY Hair Mask?
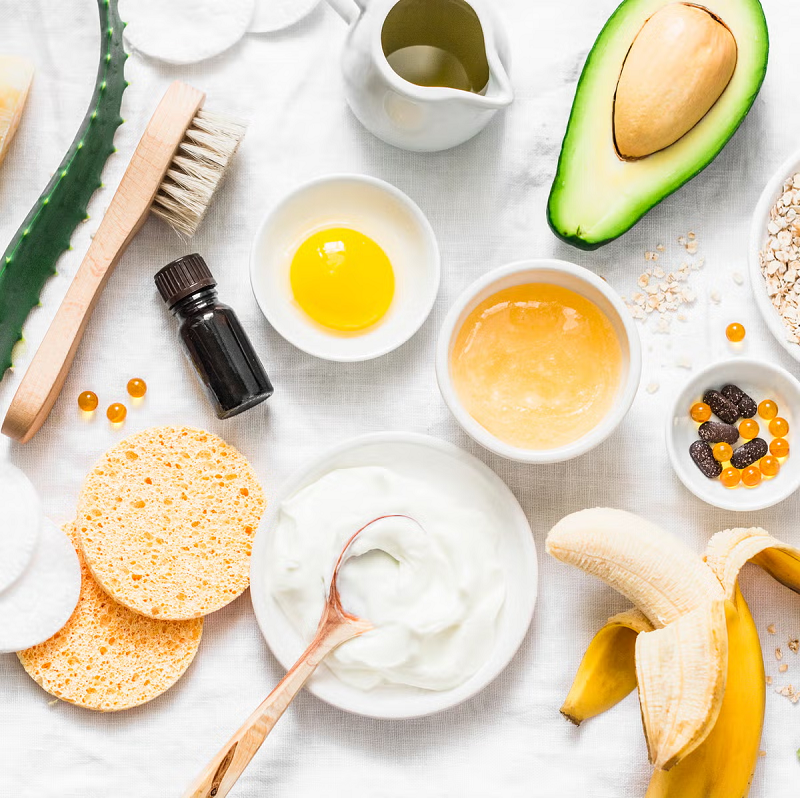
Coconut oil, honey, and egg yolk are your MVPs for moisture, shine, and strength—no mystery chemicals needed.
- Coconut Oil
- Lauric acid bonds with hair proteins to cut breakage by up to 50%.
- Honey
- Natural humectant: attracts moisture and seals it in.
- Egg Yolk
- Packed with keratin and biotin for elasticity and repair.
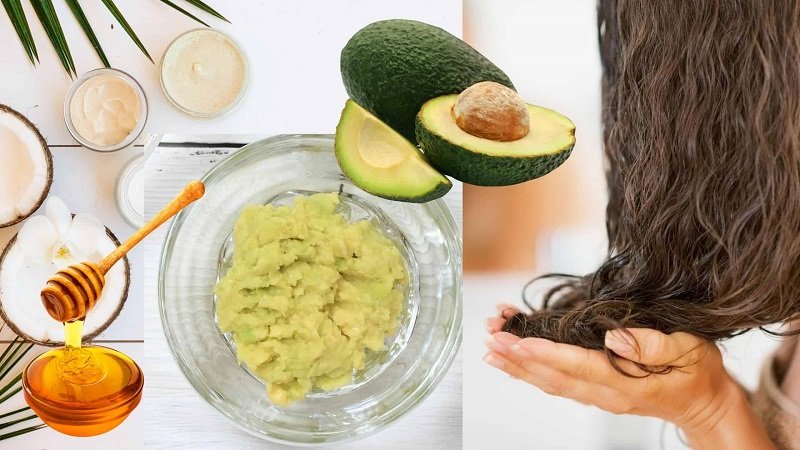
- Avocado vs. Banana
- Avocado’s fatty acids pour on deep conditioning; banana adds slip and stretch.
- Aloe Vera
- Enzymes calm your scalp and encourage healthy growth.
| Ingredient | Benefit | pH Level | Cost/Ounce |
|---|---|---|---|
| Coconut Oil | Protein penetration | ~7.0 | $0.20 |
| Honey | Humectant | 3.9 | $0.60 |
| Egg Yolk | Keratin boost | 6.4 | $0.15 |
| Avocado | Vitamins A, E, fatty acids | 6.5 | $0.50 |
| Aloe Vera | Scalp soother | 4.5 | $0.40 |
| Yogurt | Lactic acid exfoliant | 4.5 | $0.30 |
How Do You Make a Step‑by‑Step Homemade Hair Mask at Home?
Mix pantry ingredients into a smooth paste, apply it section by section from mid‑shaft to ends, wrap in a warm towel for 20–30 minutes, then rinse thoroughly with lukewarm water and finish with a light conditioner.
- Gather & Measure Ingredients
- Select quality staples: unrefined coconut oil, raw honey, ripe avocado, fresh egg yolk or yogurt.
- Portion precisely: 1–2 tbsp oil, 1 tbsp honey, ½ avocado or 1 egg yolk—use measuring spoons for consistency.
- Prep Tools & Workspace
- Use clean utensils: glass or ceramic bowl, silicone spatula, whisk, and mason jar.
- Sanitize surfaces: wipe counters with vinegar solution; rinse tools in hot water to avoid bacterial growth.
- Mixing Techniques
- Warm the oil: gently heat coconut oil to 80–90°F (27–32°C) so it blends smoothly without “cooking” the egg.
- Beat eggs separately: whisk yolk until frothy, then slowly fold in oils and honey to create a uniform emulsion.
- Mash fruits thoroughly: use a fork or small blender to prevent lumps that can snag hair.
- Application Method
- Section hair: clip into four quadrants for full coverage.
- Apply from mid‑shaft to ends first—roots last to avoid greasiness at the scalp.
- Use a tint brush or fingertips to work the mask evenly into each strand.
- Heat Activation
- Wrap with a warm towel or don a shower cap to trap heat and open cuticles, boosting ingredient penetration.
- Time it: 20 minutes for fine hair; up to 30 for very dry or coarse hair.
- Rinsing & Aftercare
- Rinse thoroughly: start at ends and work upward—lukewarm water helps emulsify oils for easier removal.
- Follow with conditioner: seal cuticles and lock in moisture, especially after protein‑rich masks.
- Blot don’t rub: gently squeeze excess water with a microfiber towel to reduce frizz.
- Storage & Shelf‑Life
- Refrigerate leftovers in an airtight jar for up to 5 days; freeze for up to 1 month.
- Label & date each batch to ensure freshness—discard at the first sign of odor change.
By mastering these steps—measurement, mixing, application, and care—you’ll craft DIY hair masks that rival high‑end salon treatments. Adjust each phase to your hair’s needs, and enjoy salon‑quality results without ever leaving home!
How Do You Apply and Remove a Homemade Hair Mask Correctly?
Divide hair into sections, smooth mask in from mid‑shaft to ends, wrap up, then rinse right to revitalize every strand.
- Section it Out
- Four quads = zero missed spots.
- Heat Boost
- Pop on a warm towel or shower cap; 20–30 minutes under gentle heat amps absorption.
- Rinse Routine
- Start at ends → move up to scalp to avoid buildup.
- Seal the Deal
- Follow with light conditioner, especially after protein‑rich masks.
- Troubleshooting
- Oily residue? Add a drop of mild shampoo to your final rinse.
| Method | Temperature | Duration | Benefit |
|---|---|---|---|
| Warm towel wrap | ~105°F (40°C) | 20–30 minutes | Deepens penetration |
| Shower cap only | Body heat | 30–45 minutes | Traps moisture |
| Room temp mask | ~70°F (21°C) | 45–60 minutes | Gentler, less risk of protein shock |
Which Hair Mask Recipes Suit Different Hair Types?
No two heads are the same—choose your mask based on texture, oiliness, and specific concerns for best results.
| Hair Type | Mask Ingredients | Frequency | Main Benefit |
|---|---|---|---|
| Fine/Oily | 1 tbsp yogurt + 1 tsp honey + 1 tsp lemon juice | Weekly | Volume without weigh‑down |
| Dry/Damaged | 1 tbsp coconut oil + ½ avocado + 1 tbsp honey | Bi‑weekly | Deep repair & softness |
| Curly/Coarse | 1 tbsp shea butter + 1 tbsp olive oil + 1 egg yolk | Weekly | Curl definition & bounce |
| Color‑Treated | 1 tbsp argan oil + 2 tbsp aloe vera + 1 tsp honey | Weekly | Color protection & shine |
| Frizzy | 1 tbsp jojoba oil + 1 tbsp honey + a few drops essential oil | Bi‑weekly | Frizz control |
- Fine vs. Thick Viscosity: Yogurt is water‑based, so it perks up fine hair without oiliness. Butters like shea are gold for coarse curls.
- Protein‑Moisture Balance: Too much egg can stiffen; balance with honey or oils for slip.
- pH Tweaks: A splash of lemon or apple cider vinegar (pH ~3) closes cuticles—great for extra shine.
- Seasonal Switch‑Ups: Lighter masks in summer, richer in winter when humidity dips.
Are Homemade Hair Masks Safe and How Often Should You Use Them?
DIY masks rock—but overdoing it or skipping a patch test can backfire. Here’s your safety cheat‑sheet.
- Patch Test
- Dab a bit on your inner arm, wait 24 hours. No itch = you’re good to go.
- Watch for Protein Overload
- Limp, straw‑like strands? Cut back on egg or yogurt.
- Scalp Check
- Itch or redness? Rinse off immediately and dilute next time.
- Adjust Use
- Fine: once/week; Dry: twice/week; Curly: once or twice depending on dryness.
- Freshness Matters
- Never use masks past fridge life—bacteria love stale mixes.
| Hair Type | Recommended Frequency | Signs of Overuse |
|---|---|---|
| Fine/Oily | Once weekly | Greasy roots, limp ends |
| Dry/Damaged | Twice weekly | Protein stiffness |
| Curly/Coarse | Twice weekly | Residue buildup |
| Color‑Treated | Once weekly | Fading color |
| Frizzy | Bi‑weekly | Oily scalp |
Conclusion
Just as each ingredient in your homemade hair mask tells a story of nourishment and care, your hair reflects the care you give it—turning your daily ritual into a moment of self-care. By blending nature’s purest gifts, you can take control of your hair’s health and shine, and remind yourself that true beauty comes from mindful choices. If you’re ready to turn this personalized ritual into a personal experience for your customers, let Zerun Cosmetics Factory tailor a private label hair mask that embodies your brand’s promise—contact us today.


