 Skip to content
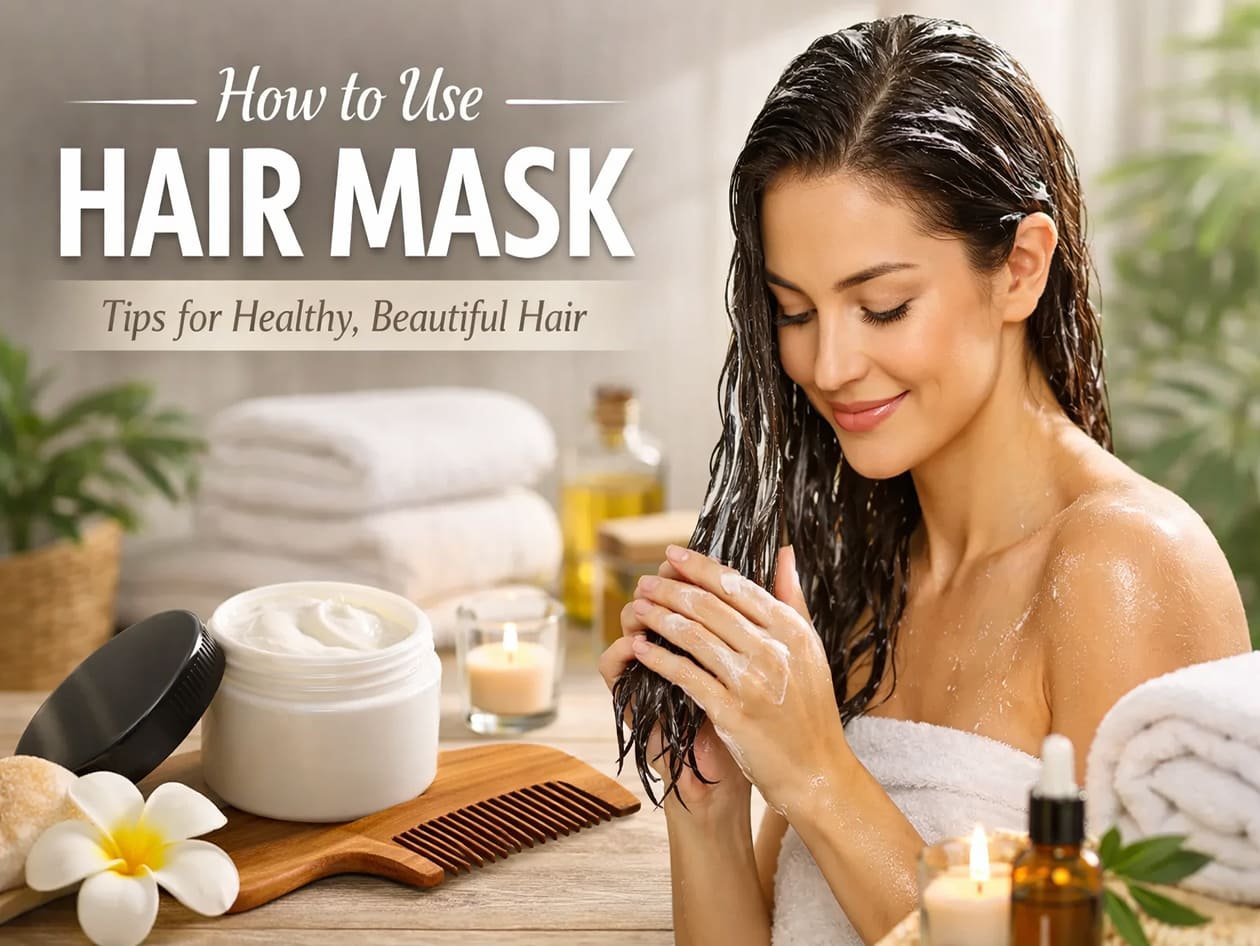
A hair mask can feel like a “luxury step,” but the truth is more practical: it’s one of the fastest ways to change how your hair behaves—how it detangles, how it frizzes, and how it looks at the ends. The catch is that masks are easy to misuse. A little too much, too close to the scalp, or left on for too long, and you get the opposite of what you wanted: flat roots, greasy lengths, dullness, or a coated feel that makes you want to shampoo again.
Using a hair mask correctly is mostly about three decisions: when you apply it, where you apply it, and how much you use. For most rinse-out masks, the most reliable method is after shampoo on damp hair, applied mainly from mid-lengths to ends, combed through for even coverage, left on for 5–15 minutes, then rinsed thoroughly. Frequency is typically weekly for most people, more often for very dry or textured hair, and less often for fine hair or oily scalps.
Once the method is right, masks stop being “hit or miss.” They become predictable: smoother ends, easier detangling, less snap-off, and a finish that looks healthier without needing extra styling tricks.
What does a hair mask actually do, and what can’t it do?
A hair mask is a concentrated conditioning treatment that improves softness, slip, and manageability by smoothing the hair’s surface and reducing friction. It can make hair look less frizzy, feel more elastic, and break less during brushing because it helps strands glide past each other instead of catching and snapping. What it can’t do is permanently repair split ends or change how hair grows from the follicle.
Hair is not living tissue once it leaves the scalp. Masks help you manage the “fabric” you already have—how it behaves day to day—rather than changing your biology. If you use masks with the right technique, you can reduce breakage and keep ends looking better for longer, which often makes hair appear fuller and healthier.
Is a hair mask different from conditioner?
Yes, and it changes what you should expect from each step. Conditioner is typically designed for frequent use and fast rinse-out: it gives you basic slip and a clean finish. A mask is usually richer or more targeted. It may deposit more conditioning agents, include different oils/lipids, or use a thicker base that stays put for a few minutes so the coating becomes more uniform.
In practice, many people do better with a simple pattern: conditioner on regular wash days, mask once a week. If your hair is fine or easily weighed down, you may prefer a lightweight mask and skip conditioner on mask day to avoid over-coating.
Why do masks make hair feel softer even if they don’t “repair” it?
A big part of “damage” is how the hair surface behaves. When the cuticle is raised or rough (from bleach, heat, UV, salt water, friction, or frequent washing), hair catches on itself. That makes tangles, frizz, and breakage more likely. Masks deposit conditioning agents that smooth those rough spots and reduce static and friction.
Think of it like conditioning a leather bag: you’re not changing what the leather is, you’re improving how it flexes and how it looks by reducing dryness and surface roughness. Same idea, different material.
Moisture masks vs protein masks—how do you choose without guessing?
A moisture-focused mask is usually the safest starting point for most people. It aims for softness, flexibility, and slip. Protein-focused masks are more specialized. They can help hair feel less “mushy” or overly stretchy after chemical processing, but too much protein (or too frequent use) can make hair feel stiff, crunchy, or straw-like.
If you want a practical way to decide, try this quick read on your hair’s behavior:
- Hair feels rough, frizzy, and tangles easily → start with moisture/lipid masks
- Hair feels overly soft but weak, stretches a lot when wet, and snaps during combing → occasional light protein or bond-support direction may help
- Hair feels stiff after masking → reduce protein frequency or switch to a softer moisture base
Can a hair mask help with hair fall?
A hair mask can help reduce breakage that looks like hair fall. Many people say “hair fall” when they actually mean strands snapping along the length, especially during detangling, blow-drying, or styling. Masks reduce breakage by improving slip and reducing friction. They do not stop shedding from the root, which is linked to hormones, health, stress, genetics, and scalp conditions.
If you see lots of short broken hairs, frayed ends, or “little pieces” after brushing, masking technique can make a noticeable difference in a few weeks. If you see increased shedding from the root (full-length strands with a tiny bulb), a mask won’t fix the cause—but it can still help your lengths look better while you address scalp factors separately.
To put it simply: masks help strands survive daily life; they don’t change what the scalp produces.

When should you use a hair mask in your routine?
For most rinse-out masks, the most reliable timing is after shampoo, on damp hair, before the final rinse. Shampoo removes oils and buildup that can block even coating. Damp hair lets the mask spread evenly without being diluted or sliding off. This is the “default” method that works for the widest range of hair types.
Pre-shampoo masking can work too, but it solves a different problem: protecting lengths during cleansing, reducing tangles, and making hair feel less stripped after shampoo. It’s useful for very dry ends, heavily bleached hair, or hair that tangles the moment water hits it.
After shampoo: why it works so well
After shampoo, the hair surface is cleaner, which makes conditioning agents distribute more uniformly. That uniform distribution is what gives the best “after rinse” feel: softer ends without random greasy sections. It also reduces the need for heavy amounts of product.
If your mask has always felt “okay but not worth it,” improving this single step (post-shampoo, damp hair) often changes everything.
Pre-shampoo masks: when they make sense
Pre-shampoo masks are helpful when your hair tends to tangle or feel rough during the wash itself. Oils or slip-heavy treatments used pre-shampoo can reduce friction while shampooing, so the hair doesn’t get as stressed.
This is also useful if you have very porous ends that grab water and swell quickly, then tangle. A pre-shampoo slip layer can reduce that “tangly swell” feeling.
A simple pre-shampoo approach:
- Apply a small amount to dry ends (not scalp)
- Leave 10–20 minutes
- Shampoo as normal
- Use a lighter conditioner or a shorter mask time after if needed
Damp vs dripping wet: the small detail that changes results
Damp hair is the sweet spot. Dripping wet hair dilutes the mask and makes it slide off. You end up using more product and still get uneven results. After shampoo, squeeze out water with your hands, then lightly towel-squeeze. You want hair that feels wet but not pouring.
If you want a quick test: if you can twist a section and water streams out, it’s too wet for masking.
Should you double shampoo before a mask?
If you use styling products, dry shampoo, waxy leave-ins, silicone-heavy sprays, or oils, a double shampoo can help the mask behave better. The first wash loosens buildup; the second wash cleans enough for even coating. If your scalp is dry or sensitive, keep shampoo gentle and focus the second wash on roots only.
You don’t need to double shampoo every time. Once a week (or every other week) is often enough if buildup is your main issue.
Here’s a practical decision guide:
| Situation | Best timing for mask | Why it helps |
|---|---|---|
| Hair feels rough and tangles in the shower | after shampoo | improves slip when it matters |
| Ends feel extremely dry before washing | pre-shampoo on ends | protects lengths during wash |
| Hair feels coated or dull after masks | after shampoo on damp hair + less product | improves evenness, reduces residue |
| You use heavy stylers or dry shampoo | double shampoo, then mask | removes barriers for better coating |
| Oily scalp, dry ends | after shampoo, ends only | prevents flat roots |
How do you apply a hair mask step by step?
The most common mistake is applying a mask like shampoo: everywhere, including roots, on soaking wet hair. The correct method is more like painting: you target the zones that need it, you use a controlled amount, and you distribute evenly.
A reliable step-by-step method:
- Shampoo
- Squeeze out excess water (damp, not dripping)
- Split hair into 2–4 sections
- Apply mask from mid-lengths to ends
- Comb through gently
- Clip up (optional) and wait
- Rinse thoroughly
How much hair mask should you use?
Most people use too much. The goal is even coating, not thick paste sitting on the surface. Start with less than you think, then add in small increments if certain sections still feel dry.
A realistic starting point:
| Hair type / length | Starting amount | What “too much” looks like |
|---|---|---|
| Fine, short hair | grape-sized | hair looks slick and strings together |
| Fine, medium hair | 1 teaspoon | roots lose lift after drying |
| Thick or curly, medium | 2 teaspoons | mask sits visibly white in patches |
| Long, thick hair | 1–2 tablespoons | ends feel waxy after rinse |
If your hair feels great in the shower but heavy when dry, reduce dose first before changing products.
Where should you apply it: roots or ends?
For most people: mid-lengths to ends only. The scalp already has natural oil production and is more likely to react to heavy formulas, fragrance, or residue. Applying masks to roots often causes flatness, itching, and faster greasing.
If you feel your top layer (not scalp) looks frizzy, you can use the “leftover” on your hands to lightly smooth the top layer without touching the scalp. That gives you polish without the greasy root problem.
Should you comb the mask through?
Yes, gently. Combing helps with even coverage, which reduces patchy greasy spots. Use a wide-tooth comb or fingers. Start at the ends and work upward slowly. The goal is distribution, not aggressive detangling.
If you have fragile bleached hair, combing under tension can snap strands. Use a comb only after the mask has softened the hair and reduced friction.
Do you need a shower cap or heat?
A shower cap is helpful for two reasons: it keeps the mask from drying and keeps it in contact with hair. Mild warmth can help comfort and spread, but you don’t need intense heat. A cap plus a warm towel for 5–10 minutes is plenty.
If you notice your hair becomes dry after using heat tools, avoid adding extra heat during masking. Keep it simple and consistent.
Rinsing: the part most people rush
A lot of “mask made my hair greasy” complaints come from under-rinsing, especially around the nape and behind ears. Rinse longer than you think, and keep fingers moving through hair to help water pass through the coated sections.
A good rinse should leave hair slippery but not slimy. If it feels slimy, there’s likely product sitting on the surface.
To close this section plainly: technique is the biggest variable. When placement, dose, and distribution are right, you need less product and get more consistent results.
How long should you leave a hair mask on?
Most rinse-out masks work best in the 5–15 minute range. Shorter than that can still work for lightweight masks, especially on fine hair. Longer than that doesn’t always help and often increases residue, especially with richer formulas.
A good rule: leave it on long enough to coat evenly and reduce friction, not long enough to create heavy buildup.
Does longer time always mean better results?
Not necessarily. Many masks reach peak performance within the time the brand recommends. After that, you mainly increase the chance of heaviness, especially if the mask is rich in oils, butters, or heavy conditioning agents.
If you feel the mask “worked” but your hair looks dull after drying, shorten time or lighten the dose. That usually solves it faster than buying a new product.
Timing by hair needs
| Hair profile | Good time range | Why |
|---|---|---|
| Fine hair, oily scalp | 3–7 minutes | reduces buildup risk |
| Normal hair | 5–10 minutes | balanced performance |
| Dry, thick, frizzy hair | 10–15 minutes | improves slip and softness |
| Bleached, high-porosity | 5–10 minutes | avoids heavy residue and stiffness |
| Curly/coily hair | 10–20 minutes | supports detangling and definition |
| Bond/repair systems | follow label | timing often affects performance |
Can you leave a hair mask overnight?
Only if it’s designed as an overnight product. Many rinse-out masks are not meant to sit for hours. They can cause a waxy feel, attract dust, and irritate sensitive scalps if product migrates upward.
If you want overnight conditioning, a leave-in overnight treatment is usually better than a classic rinse-out mask. It’s formulated to be lightweight enough to stay on hair comfortably.
How to tell if you’re leaving it on too long
These are common signals:
- Hair feels coated, heavy, or dull after drying
- Roots feel flatter than normal
- Hair takes longer to dry and feels “sticky” mid-dry
- You feel you need more shampoo the next wash
Shortening time by just 3–5 minutes can make a surprising difference, especially on fine hair.
The simple close here: most people don’t need longer time—they need better distribution and the right amount on damp hair.

How often should you use a hair mask?
Weekly is the best starting point for most people. If your hair is very dry, textured, or chemically treated, 1–2 times per week can work. If your hair is fine or your scalp is oily, every 10–14 days is often better. Frequency is less about “what’s ideal” and more about “how quickly your hair shows residue.”
Frequency by hair type and lifestyle
If you heat-style often, swim, or live in dry climates, you may need masking a bit more frequently because friction and dryness accumulate faster. If you use lots of styling products, your hair may need more clarifying and slightly less heavy masking to avoid buildup.
A practical guide:
| Hair / routine | Starting frequency | Adjust if you notice… |
|---|---|---|
| Fine hair | every 10–14 days | flat roots → reduce dose/time |
| Normal hair | weekly | dullness → clarify or lighten mask |
| Dry ends | weekly + small leave-in | dryness persists → add second weekly mask |
| Curly/coily | 1–2× weekly | curls heavy → reduce oils/butters or dose |
| Bleached/colored | weekly | stiffness → reduce protein-heavy masks |
Rotating moisture and protein masks
Rotation can help, but keep it simple. Many people do best with a moisture mask most weeks and an occasional protein/bond-support direction every 2–4 weeks if hair is chemically processed.
If you rotate too many “repair” products at once (protein shampoo + protein conditioner + protein mask), stiffness is almost guaranteed.
Clarifying and masking: the combination that prevents dullness
If you mask regularly and use stylers, a gentle clarifying wash every 2–4 weeks helps reset the hair surface so masks don’t stack into dullness. Clarifying doesn’t have to be harsh; the goal is removing residues that block even coating.
If your mask results keep getting worse over time, it’s often not the mask—it’s residue accumulation.
A simple close here: the best frequency is the lowest frequency that keeps ends soft without sacrificing bounce at the roots.
Common hair mask mistakes and how to adjust quickly
If a mask “doesn’t work,” it’s almost always one of these: wrong placement, wrong amount, wrong mask type for your hair, or poor rinse. Fixes are usually small and immediate.
“My hair feels greasy after a mask”
This is usually roots + dose + rinse. Masks belong on lengths, not scalp. Fine hair needs less product and shorter time.
Try these adjustments:
- apply from mid-lengths down only
- cut dose by 30–50%
- keep contact time under 10 minutes
- rinse longer and more thoroughly at the nape and behind ears
- choose a lighter cream-gel mask if the formula is oil/butter heavy
“My hair feels stiff or dry after masking”
This often points to protein overload or a formula that leaves film without enough softness for your hair. It can also happen if you’re washing too harshly and expecting a mask to compensate.
Try:
- switch to a moisture-forward mask
- reduce protein mask frequency
- avoid stacking multiple protein products
- add a small leave-in on ends on non-mask days
- limit very hot water and aggressive towel rubbing
“My scalp itches after I use a mask”
Many masks are fragranced and not designed for scalp contact. Even if you apply to lengths, product can migrate upward if you pile hair on your head and let it sit.
Try:
- keep mask away from scalp and hairline
- clip hair loosely so product stays on lengths
- rinse carefully around hairline and neck
- choose a lower-fragrance or fragrance-free option if you’re sensitive
If irritation persists, stop using that product and reassess. Scalp comfort matters more than any “repair” claim.
“My curls are still frizzy”
Curly hair often needs two things from a mask: slip for detangling and balanced conditioning that doesn’t create waxy buildup. Frizz can be uneven distribution, not enough contact time, or harsh rinsing.
Try:
- apply in sections
- comb through gently while mask is on
- use a cap for consistent contact
- rinse thoroughly but avoid aggressive scrubbing
- follow with a curl-friendly leave-in on ends if needed
Here’s a quick troubleshooting table that readers love because it’s practical:
| What you feel | Most common reason | Best adjustment |
|---|---|---|
| Flat roots | mask too close to scalp | keep off roots, reduce dose |
| Greasy lengths | too much product or under-rinse | use less, rinse longer |
| Stiff ends | too much protein | moisture mask, rotate less |
| Dull hair | buildup stacking | clarify every 2–4 weeks |
| Patchy greasy spots | uneven spread | section hair, comb through |
| Frizz after mask | not enough slip or harsh rinse | cap + gentle detangle + leave-in |
For brands: how to design a private label hair mask customers use correctly
A hair mask’s success in the market is often decided by “how people use it,” not just the ingredient list. Poor directions lead to predictable complaints: greasy roots, buildup, “did nothing,” or “made my hair stiff.” Brands that win make the product easy to use correctly and hard to use incorrectly.
What usage directions actually reduce complaints?
The best directions are short but specific. They answer the exact mistakes customers make:
- Apply after shampoo on damp hair
- Focus on mid-lengths and ends
- Leave 5–10 minutes (or your validated range)
- Rinse thoroughly
- Use weekly (or based on hair type)
If your mask is rich, explicitly say “avoid scalp” in simple words. If your mask is scalp-safe, say that clearly too—otherwise customers assume all masks can go on roots.
How to match texture to your target audience
The biggest mismatch we see in the market is heavy masks sold to fine-hair customers. That produces fast negative reviews. A smart approach is to build two texture directions:
- Lightweight cream-gel for fine hair / oily scalps / daily-wash users
- Rich cream for thick, frizzy, curly, or chemically treated hair
If you position a mask as “lightweight but effective,” your formula must rinse clean and leave bounce, not coating. If you position it as “intensive repair,” your directions must warn customers about dose and root application.
Packaging choices that change user behavior
Packaging quietly shapes dosing and hygiene:
- Jars feel premium but encourage overuse and shower water contamination
- Tubes control dose and feel hygienic (often better for Amazon/DTC)
- Pump jars/airless can feel premium, but viscosity compatibility must be engineered to avoid clogging or poor evacuation
| Packaging format | What customers do with it | What to plan for |
|---|---|---|
| Jar | scoops “a lot” | dose guidance matters |
| Tube | uses consistent amount | great for controlling complaints |
| Pump/airless | expects premium, no mess | compatibility testing is non-negotiable |
Claims and positioning: what stays safe and still sells
Hair masks sell best with benefits customers can feel:
- softer and more manageable hair
- smoother-looking ends
- easier detangling
- frizz appearance control
- helps reduce breakage from brushing
Avoid medical or regrowth positioning unless you’re operating in the correct regulatory lane and have substantiation. “Breakage reduction” is usually safer than “hair fall prevention,” and it matches what a mask truly does.
Quality checks that protect reorders and reviews
For brands, consistency matters as much as the first sample. Practical checkpoints typically include:
- stability planning for your chosen packaging
- microbial control appropriate for rinse-off products
- viscosity window control for batch-to-batch consistency
- fragrance stability and odor drift checks
- leakage resistance if you’re selling in Amazon/FBA-style channels
If you keep QC anchors consistent (pH where relevant, viscosity range, appearance/odor expectations), you reduce “my second jar felt different” reviews.
A simple close here: a winning hair mask is a system—texture + directions + packaging + QC discipline. When those align, your product performs the same way in a customer’s shower as it did in the sample.
Conclusion
A hair mask works best when you treat it like targeted conditioning, not a “more is better” step. Shampoo first, squeeze hair to damp (not dripping), then apply the mask mainly from mid-lengths to ends. Comb through gently for even coverage, leave it on 5–15 minutes for most rinse-out masks, and rinse thoroughly—especially at the nape and behind the ears. For most people, weekly masking is enough; very dry, curly, or chemically treated hair may need 1–2 times per week, while fine hair and oily scalps usually do better every 10–14 days with lighter textures. If results feel greasy, flat, stiff, or dull, adjust placement, dose, time, and rinse before switching products.
If you’re developing a hair mask for your brand and want a formula that delivers clean-rinse softness, predictable slip, and packaging that fits your channel, contact Zerun Cosmetic. Share your target market, hair profiles, texture goal, and packaging preference, and we’ll propose a clear sampling plan and private label/custom development roadmap.


