Skip to content
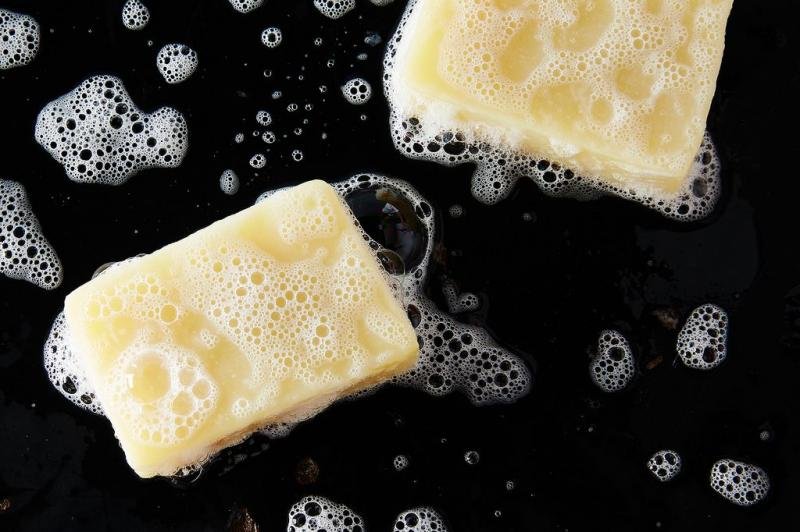
Have you ever wondered how everyday soap transforms from simple ingredients into a luxurious, aromatic bar that cleanses and nourishes? In this guide, we pull back the curtain on the soap-making process, revealing the secrets behind each step to help you craft your own artisanal soap at home.
Soap making is a carefully balanced art and science. It involves combining fats, oils, water, and lye to initiate saponification. With careful temperature control, accurate measurements, and proper curing, you can create soap that is not only cleansing but also rich in natural additives and custom scents, ensuring quality and longevity.
What Are the Main Ingredients Needed for Soap Making?

Fats and Oils
Role in Soap Making:
Fats and oils are the foundation of soap, providing the long fatty acid chains that react with lye to form soap and glycerol. This reaction, known as saponification, converts triglycerides (found in fats and oils) into soap molecules.
Types of Fats and Oils:
Vegetable Oils:
- Olive Oil: Offers gentle cleansing and excellent moisturizing qualities, creating a mild soap ideal for sensitive skin.
- Coconut Oil: Produces a hard bar with a rich lather and is known for its cleansing power, though it can be drying if used in excess.
- Palm Oil: Often used to increase hardness and lather; however, sustainability concerns should be considered when sourcing palm oil.
- Castor Oil: Provides a creamy lather and adds conditioning properties.
Animal Fats:
- Tallow or Lard: Traditional soap makers often use these fats for their ability to produce a firm, long-lasting bar with a stable lather. They offer a different blend of fatty acids, which affects the soap’s texture and hardness.
Chemical Considerations:
- Saponification Value (SAP): Each fat or oil has a specific SAP number that indicates how much lye is needed to convert it into soap. For example, coconut oil has a different SAP value than olive oil, meaning precise calculations are necessary for a balanced reaction.
- Fatty Acid Composition: The chain length and degree of saturation in fats influence soap properties such as hardness, lather quality, moisturizing ability, and shelf-life.
- Blending Oils: Combining different types of oils allows you to tailor the soap’s characteristics. For instance, a blend with high coconut oil content might yield a soap with a robust lather, while olive oil enhances moisturizing properties.
Lye (Sodium Hydroxide)
Role in Soap Making:
Lye is the alkaline substance that reacts with fats and oils through the saponification process. Without lye, the chemical transformation required to form soap would not occur.
Key Points in Handling Lye:
- Chemical Reaction: When lye (sodium hydroxide) mixes with fats, it breaks apart the triglyceride molecules. The fatty acid chains bond with sodium ions to form soap, while glycerol is released as a beneficial by-product that acts as a moisturizer.
- Precise Measurement: Calculations based on the specific SAP values for each oil must be accurate. Too much lye can result in a harsh, caustic product that irritates the skin, whereas too little lye leaves unreacted oils, resulting in a soft or greasy soap.
Grades and Quality:
- Soap-Grade Lye: Always use cosmetic or soap-making grade lye to ensure consistency and minimize impurities.
- Measurement Accuracy: Investing in a digital scale capable of measuring to the gram is essential to maintain the correct ratios.
Safety Considerations:
- Lye is highly caustic and can cause severe burns. Always handle with proper protective gear (gloves, goggles, long sleeves) and work in a well-ventilated area.
- Always add lye slowly to water (never reverse the order) to prevent a violent exothermic reaction that might cause splattering.
Water
Role in Soap Making:
Water dissolves the lye and facilitates the chemical reaction between lye and oils. It acts as the solvent in which the saponification process occurs.
Selection and Usage:
Purity:
- Distilled Water: Using distilled water is recommended, as it contains no minerals or impurities that may interfere with the soap-making process.
- Alternative Liquids: While water is standard, some advanced recipes may substitute other liquids (such as herbal teas, milk, or aloe vera juice) to introduce additional properties into the soap. However, these alternatives require adjusted formulations because of their varying pH and nutrient content.
Temperature Impact:
- The temperature of the water used to dissolve lye is critical. Typically, it should be heated to a moderate temperature so that the mixture combines smoothly with the oils.
- Water temperature can influence the speed of the reaction, helping to control the onset of trace (the point when the mixture begins to thicken).
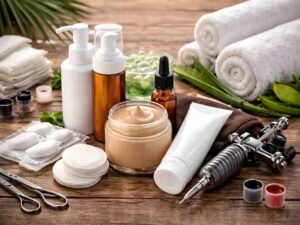
Optional Custom Additives
Enhancing the Soap’s Characteristics:
Once the basic ingredients have been combined, many soap makers incorporate additional elements to improve the soap’s visual appeal, fragrance, and skin benefits.
Types of Additives:
Essential Oils and Fragrances:
- These provide a pleasant aroma and can also contribute therapeutic properties such as relaxation (lavender) or invigoration (eucalyptus).
- Proper usage is important: typically, a small percentage (usually between 0.5% and 2% of the total recipe) is sufficient to avoid compromising the soap’s chemistry.
Colorants:
- Natural colorants like clays, botanicals, or mica powders introduce vibrant hues without synthetic chemicals.
- They can also add subtle skincare benefits (for example, kaolin clay is known for its gentle cleansing properties).
Botanicals and Exfoliants:
- Ingredients such as oats, dried herbs, or coffee grounds provide texture and can offer exfoliating properties.
- They also enhance the aesthetic appeal of the final product.
Guidelines for Incorporating Additives:
Concentration Control:
- Each additive typically needs to be used in a controlled amount to ensure it doesn’t disrupt the saponification process or alter the desired pH of the soap.
Testing:
- It’s advisable to test small batches when experimenting with additives, particularly those that might affect the soap’s consistency or the overall reaction.
Calculating the Recipe: A Practical Example
Understanding Ratios:
The success of a soap recipe relies on the correct ratios of oils, lye, and water.
| Ingredient | Typical Range (%) | Purpose |
|---|---|---|
| Oils & Fats | 60-80% | Base for saponification |
| Lye | 10-15% | Catalyst for converting fats |
| Water | 15-20% | Solvent to mix lye and oils |
| Additives | 1-5% | Enhancing fragrance/texture |
Example Calculation:
- Suppose you are using a blend of 500 grams of oils, and the chosen oils have a combined SAP value requiring 70 grams of lye for complete saponification. You would dissolve these 70 grams of lye in 150 grams of distilled water (following the recommended ratios).
- Always use a trusted soap calculator to adjust for differences in oil types; these tools ensure that the lye and water amounts align precisely with the oils used.
By understanding the individual roles of fats and oils, lye, water, and optional additives, you gain the knowledge needed for successful soap making. Each component not only contributes to the chemical reaction that creates soap but also influences the final product’s texture, hardness, and performance on the skin. Balancing these ingredients with precise measurements and appropriate safety measures is crucial for crafting high-quality soap.
Which Soap Making Method Should You Choose
The cold process offers control and customizability, the hot process speeds up saponification with a rustic finish, while melt and pour is ideal for beginners due to its ease and safety. Choosing the right method depends on your skill level and desired soap characteristics.
Cold Process
- Overview: This method involves mixing oils and lye at controlled temperatures, allowing saponification to occur slowly over several days.
- Advantages: Greater control over ingredients, natural glycerin retention, and the ability to create custom textures and designs.
- Challenges: Requires precise temperature management and a longer curing time of 4–6 weeks.
- Ideal For: Experienced soap makers who value creative freedom and high-quality results.
Hot Process
- Overview: In the hot process, the soap batter is cooked, which speeds up the saponification process.
- Advantages: Faster turnaround time—soap is typically ready to use in a week or less—and a rustic, artisanal look.
- Challenges: The appearance of the finished product can be less smooth, and the method offers fewer opportunities for intricate designs.
- Ideal For: Crafters who prefer a quicker process and a more traditional, handmade aesthetic.
Melt and Pour
- Overview: This is a pre-made soap base that you melt, add custom ingredients, and then pour into molds.
- Advantages: User-friendly, safe since no lye handling is involved, and allows for immediate customization through colors, scents, and additives.
- Challenges: The soap base already contains glycerin and other components, limiting full control over the end product.
- Ideal For: Beginners or those looking for a convenient, less technical approach to soap making.
Comparative Overview Table
| Method | Skill Level | Customization Control | Curing Time | Safety Considerations |
|---|---|---|---|---|
| Cold Process | Intermediate | High | 4-6 weeks | Requires careful lye handling |
| Hot Process | Intermediate | Moderate | 1 week or less | Heated process reduces risks |
| Melt and Pour | Beginner | Limited | Minimal (ready quickly) | No lye handling involved |
By weighing the pros and cons of each method, you can decide which approach best aligns with your soap-making goals and experience level.
How Do You Safely Handle Lye Solution and Other Soap Making Tools?

Safety is paramount in soap making. Always wear personal protective equipment, work in a well-ventilated area, and measure ingredients accurately. Use non-reactive tools, and follow precise procedures to avoid burns or chemical reactions when handling lye and mixing chemicals.
Personal Protective Equipment (PPE)
- Essentials: Wear safety goggles, gloves, a long-sleeve shirt, and closed-toe shoes.
- Reasoning: PPE protects your skin and eyes from the caustic nature of lye.
- Tips: Ensure PPE fits well and is made of materials that resist chemical splashes.
Lye Handling Best Practices
- Mixing Order: Always add lye to water—not water to lye—to prevent violent reactions.
- Temperature Control: Use a thermometer to monitor the temperature of both the lye solution and the oils for a stable reaction.
- Containment: Use heat-resistant, non-reactive containers (like stainless steel or heavy-duty plastic) to mix the lye solution.
Tool Safety and Maintenance
- Recommended Tools: Stainless steel pots, heat-proof spatulas, digital thermometers, and silicone molds.
- Handling Tips: Keep your working area clean and organized, and immediately rinse tools with water after use to prevent chemical buildup.
- Maintenance: Regularly inspect and replace any worn-out equipment to maintain a safe workspace.
Safety Checklist
- Work in a dedicated, clutter-free area.
- Keep a bottle of vinegar nearby as a neutralizing agent (only for spills, not for mixing).
- Never mix lye near children or pets.
- Always dispose of lye waste responsibly.
These safety practices form the backbone of any successful soap-making operation—helping you avoid hazards while ensuring an effective saponification process.
Are There Specific Techniques for Mixing and Monitoring Soap Batter?
Yes, achieving the proper emulsion is key. Constant stirring, temperature monitoring, and using immersion blenders can help you reach “trace,” where the mixture thickens. Precision in timing and consistency are critical to ensure the soap batter develops the correct texture and properties.
Achieving Emulsion
- Method: Begin by mixing lye solution and oils at similar temperatures (around 95°F to 105°F) to create a uniform blend.
- Key Indicator: Look for “trace” – the point where the mixture thickens and leaves a trail on the surface.
- Techniques: Use an immersion blender in short bursts to avoid over-mixing, which can lead to separation.
Monitoring Saponification
- Observation: Monitor the color, viscosity, and scent changes in the batter, which indicate successful saponification.
- Temperature Control: Maintain steady temperatures throughout mixing to prevent premature solidification or separation.
- Timers: Using a timer can help you keep track of the mixing duration, ensuring that each phase of the process is completed properly.
Avoiding Common Pitfalls
- Air Incorporation: Over-beating can incorporate too much air, leading to bubbles or an inconsistent texture.
- Ingredient Miscalculation: Always recheck your measurements; even small deviations can result in an unbalanced reaction.
- Example: A recipe with inaccurate lye-to-oil ratios may yield soap that is either too harsh or overly soft.
A Practical Guide to “Trace”
| Stage | Visual Cue | Approximate Time* |
|---|---|---|
| Light Trace | Slight thickening, drizzle remains visible | 3-5 minutes |
| Medium Trace | Batter holds a trail when drizzled | 5-8 minutes |
| Heavy Trace | Dense, pudding-like consistency | 8-12 minutes |
Times vary based on recipe and environmental conditions.
Mastering the mixing process not only ensures a consistent final product but also deepens your understanding of the dynamic chemical reactions at play.
Is Curing Time Important? How Long Should You Wait?
Absolutely, curing time is crucial. It allows the soap to harden, improve lather quality, and neutralize residual alkalinity. Generally, a curing period of 4–6 weeks is recommended for cold process soaps, though hot process soaps may cure in a shorter time.
The Curing Process
- Definition: Curing is the period during which excess water evaporates and saponification completes fully.
- Effect on Quality: Longer curing results in a firmer, longer-lasting soap with a balanced pH, reducing skin irritation potential.
Effect of Curing on Soap Qualities
- Hardness: Fully cured soap is less likely to dissolve quickly, prolonging its use.
- Lather: Proper curing enhances the soap’s ability to form a stable, creamy lather.
- pH Balance: Curing ensures that any residual lye is neutralized, making the soap gentle on the skin.
Recommended Curing Durations
- Cold Process: Typically 4–6 weeks; some high-fat recipes may benefit from up to 8 weeks.
- Hot Process: Can be ready within a week, but additional resting time is advised for optimal performance.
- Melt and Pour: Requires minimal curing; cooling until solid is usually sufficient.
Curing Timeline Table
| Soap Method | Minimum Curing Time | Ideal Curing Time | Impact on Final Product |
|---|---|---|---|
| Cold Process | 4 weeks | 4-6 weeks (up to 8) | Increased hardness and improved lather |
| Hot Process | 1 week | 1-2 weeks | Rapid use with a rustic finish |
| Melt and Pour | Minimal | Immediate to 24 hours | Quick turnaround, limited customizability |
Monitoring the curing process ensures that your soap not only looks great but also performs exceptionally well with every use.
Do Natural Additives and Essential Oils Enhance Soap Quality?
Yes, natural additives like botanical extracts and essential oils boost both the therapeutic properties and sensory appeal of your soap. They provide benefits such as improved fragrance, enhanced moisturizing effects, and a unique aesthetic that sets your soap apart in a competitive market.
Benefits of Natural Additives
- Skin Benefits: Natural additives often include antioxidants, vitamins, and antibacterial properties that promote skin health.
- Aesthetics: They can introduce textures, patterns, and colors that make each soap bar unique.
- Customer Appeal: A product enriched with natural ingredients is more attractive to health-conscious consumers.
Selecting the Right Essential Oils
- Factors to Consider: When choosing essential oils, consider skin compatibility, scent strength, and the oil’s therapeutic properties.
- Popular Choices: Lavender, tea tree, and eucalyptus are favored for their calming, antiseptic, and invigorating qualities.
- Usage Guidelines: Use in moderation since high concentrations can irritate sensitive skin or alter the soap’s chemical balance.
Customizing Scents and Textures
- Techniques: Combine multiple essential oils to create signature scents, or add botanicals like dried herbs for a layered texture.
- Experimentation: Test different ratios in small batches to fine-tune the final product’s characteristics.
- Practical Example: A bar combining coconut oil, lavender, and oatmeal offers both soothing aroma and a gentle exfoliating effect.
Data Snapshot
| Essential Oil | Key Benefit | Typical Usage Ratio (%) |
|---|---|---|
| Lavender | Calming, anti-inflammatory | 0.5-2 |
| Tea Tree | Antiseptic, clarifying | 0.5-1.5 |
| Eucalyptus | Refreshing, respiratory aid | 0.5-1 |
Incorporating natural additives is not just an aesthetic choice—it scientifically enhances the overall effectiveness and market appeal of your soap.
How Do You Store, Package, and Customize Handmade Soap for Best Results?

Proper storage, creative packaging, and tailored customization are essential. Store your soap in a cool, dry place to maintain its quality. Use airtight containers or sustainable wrapping for packaging, and add personalized touches to stand out and attract a loyal customer base.
Storage Best Practices
- Environment: Keep soap bars in a well-ventilated, cool area to allow continued curing and to prevent moisture buildup.
- Containers: Consider using wooden racks or mesh bags for air circulation.
- Organization: Label batches with dates and ingredients to track performance and shelf-life.
Innovative Packaging Solutions
- Aesthetic Appeal: Unique, eco-friendly packaging can be a strong selling point.
- Practical Tips: Use recyclable materials, minimalistic designs, and clear labeling to communicate the product’s natural attributes.
- Market Insight: According to recent trends, consumers favor packaging that tells a story—highlight the natural, handmade nature of your soap.
Customization Techniques
- Brand Identity: Personalize your soap with custom logos, unique shapes, or special textures that reflect your brand’s story.
- Bulk Custom Orders: For those looking to retail or gift your soap, offering customization enhances brand loyalty and market differentiation.
Practical Table
| Aspect | Best Practice | Benefit |
|---|---|---|
| Storage | Cool, dry, well-ventilated area | Extends curing, preserves quality |
| Packaging | Eco-friendly, customized designs | Enhances brand appeal, sustainability |
| Customization | Logos, unique shapes, textures | Increases market differentiation |
By combining optimal storage, creative packaging, and effective customization, you ensure that your soap not only performs well but also builds a memorable brand experience for your customers.
Conclusion
By following this detailed, step-by-step guide, you’ll not only learn how to make soap but also gain the knowledge and confidence to innovate and craft products that truly stand out in today’s competitive skincare market. Enjoy your soap-making journey and feel free to contact us at Zeun Cosmetic Factory for further customization and consultation.