Skip to content
Applying a face mask isn’t just a pampering ritual—it’s a precise science that can transform dull, stressed skin into a radiant, healthy-looking canvas. Whether you’re racing against a deadline, battling breakouts, or simply seeking a moment of self-care, understanding how to use a face mask correctly is crucial for real results.
To use a face mask effectively, start by cleansing and exfoliating your skin to remove impurities. Apply an even layer of mask, avoiding the eye area. Leave it on for the recommended 10–20 minutes, then rinse gently. Follow with a toner, serum, and moisturizer to lock in benefits.
What Is a Face Mask?
A face mask is a concentrated skincare treatment designed to address specific concerns—hydration, detox, brightening, or calming. Masks deliver potent ingredients more deeply than daily products, boosting skin’s texture, tone, and overall health in one simple application.
Definition & Purpose
- Temporary, intensive treatments with active ingredients
- Differ from daily cleansers or moisturizers in concentration and formulation
Main Benefits
- Hydration: Hyaluronic acid, glycerin masks replenish moisture
- Detoxification: Clay masks draw out excess oil and pollutants
- Brightening: Vitamin C or enzyme masks fade dullness and hyperpigmentation
- Calming: Aloe, chamomile masks soothe redness and irritation
Choosing According to Goals
- Match mask function to skin concern—never treat acne-prone skin with only hydrating masks
- Consider seasonal shifts: heavier hydration in winter, lighter exfoliation in summer
By understanding what a face mask actually does—beyond the indulgent “spa day” feel—you can strategically select treatments that tackle your skin’s unique needs.
Which Types of Face Mask?
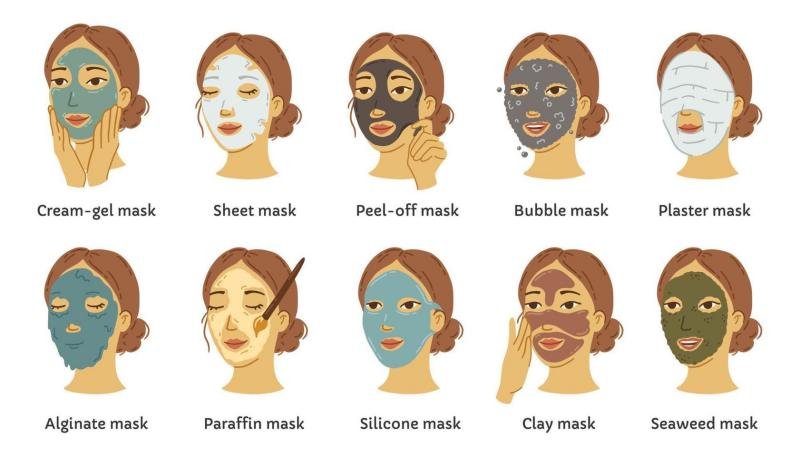
Face masks come in five main formats—clay, sheet, cream, gel, and peel-off—each formulated for distinct concerns. Choose based on skin type, desired outcome, and tolerance: oily skin loves clays, dry skin needs creams, and sensitive skin fares best with gentle gels or sheets.
Clay Masks
- Suitable for: Oily, acne-prone skin
- Key ingredients: Kaolin, bentonite, charcoal
- Critical View: Overuse can strip natural oils—limit to 1–2 times/week
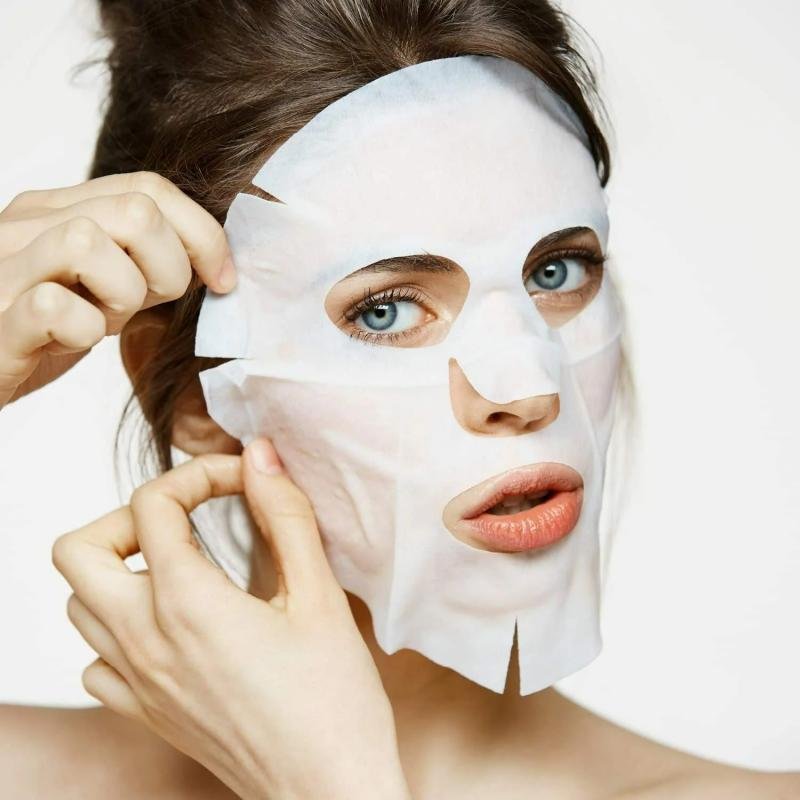
Sheet Masks
- Suitable for: All skin types, especially dehydrated or dull
- Key ingredients: Serums infused with hyaluronic acid, peptides, botanical extracts
- Critical View: Single-use convenience vs. environmental waste—look for biodegradable options
Cream & Cream-to-Foam Masks
- Suitable for: Dry, mature skin
- Key ingredients: Ceramides, fatty acids, antioxidants
- Critical View: Some heavy oils can clog pores if not removed thoroughly
Gel Masks
- Suitable for: Sensitive, irritated skin
- Key ingredients: Aloe vera, green tea, cucumber extracts
- Critical View: Lower efficacy for deep cleansing—combine with other treatments if needed
Peel-Off Masks
- Suitable for: Surface exfoliation, blackhead removal
- Key ingredients: PVA polymers, mild acids
- Critical View: Can aggravate fragile skin—avoid around delicate areas
Comparison Table
| Mask Type | Best For | Key Ingredient | Frequency |
|---|---|---|---|
| Clay | Oily/Acne-Prone | Kaolin, Bentonite | 1–2× weekly |
| Sheet | Dehydrated/Dull | Hyaluronic Acid | 2–3× weekly |
| Cream | Dry/Mature | Ceramides | 1–2× weekly |
| Gel | Sensitive/Redness | Aloe Vera | 2–3× weekly |
| Peel-Off | Blackheads/Exfoliation | PVA, Fruit Acids | 1× weekly (max) |
Selecting the right format isn’t just about preference—it’s about compatibility with your skin’s biology and environmental ethos.
How Should Prep Skin Before Applying a Face Mask?

Start with a gentle cleanser to remove makeup and grime, then exfoliate lightly to slough off dead cells. A warm towel or steam can further open pores, ensuring the mask’s active ingredients penetrate deeply for maximum effect.
Step 1: Double-Cleansing
- Oil-based cleanser to dissolve makeup/sunscreen
- Water-based cleanser to clear residual dirt
Step 2: Gentle Exfoliation
- Physical scrubs vs. chemical exfoliants (AHA/BHA)
- Critical Note: Over-exfoliation weakens barrier—limit to 1× per week
Step 3: Steam or Warm Towel
- Why it matters: Heat loosens sebum, unclogs follicles
- Home hack: DIY facial steam with herbs (chamomile) for added soothing
Step 4: Pat Skin Dry
- Avoid towel friction; use soft microfiber
- Damp skin aids serum-based sheet masks adherence
Proper prep clears the way for active ingredients—skipping these steps is like digging for treasure without a map.
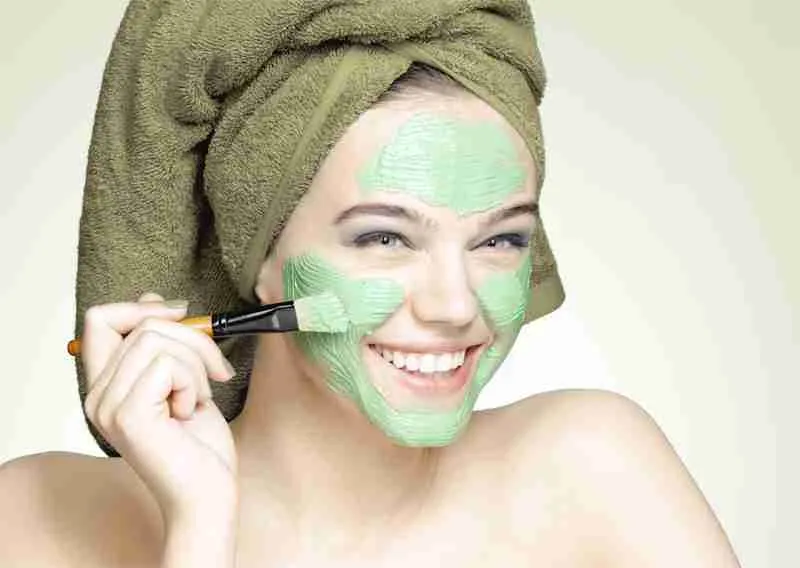
How to use a face mask step by step?
Using clean fingers or a silicone spatula, spread a thin, even layer of mask onto damp skin, avoiding eyes and lips. Ensure full coverage, then relax for the recommended time. Follow with gentle rinsing and pat-dry to complete the ritual.
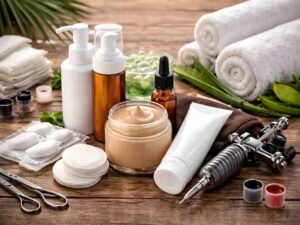
Tools of the Trade
- Spatulas vs. Brushes: Spatulas minimize waste; brushes offer precision
- Silicone sheet under basin: Prevents clogs, simplifies cleanup
Layering Technique
- Thin vs. Thick Applications: Thin for chemical/exfoliating masks, thicker for clay or cream for occlusion
- Edge awareness: Leave margin around eyes/lips to avoid sensitivity
Timing & Environment
- Clock-check: Use a soft-timer or meditation app for consistency
- Relaxation cues: Inhale calming essential oils (lavender) to heighten the spa feel
Rinsing Ritual
- Water temperature: Lukewarm to avoid barrier shock
- Method: Circular motions with fingertips, followed by splash of cool water to seal pores
Applying a mask well is part art, part science—approach it mindfully and you’ll reap both skin and wellness benefits.
How many minutes to leave a face mask?
Most masks perform optimally within 10–20 minutes. Clay masks typically need shorter times (10–15 minutes) to prevent over-drying, while hydrating or cream masks can stay on up to 20 minutes without risk. Always follow the product’s directions.
Timing by Mask Type
| Mask Format | Recommended Duration | Rationale |
|---|---|---|
| Clay | 10–15 minutes | Prevents excessive oil removal and tightness |
| Sheet | 15–20 minutes | Allows serum absorption without drying |
| Cream/Gel | 10–20 minutes | Balances hydration and ingredient release |
| Peel-Off | 15–20 minutes | Ensures full polymer set for easy removal |
Critical Considerations
- Under-timing: May not fully activate key ingredients
- Over-timing: Can lead to irritation, barrier compromise
Environmental Factors
- Humidity: High humidity slows mask drying, adjust time shorter
- Airflow: Dry climates may accelerate drying—monitor closely
Adaptive Timing
- Listen to your skin: if mask cracks heavily, rinse earlier
- Trial-and-error: test durations in small increments
Understanding “why” behind the clock helps you avoid common pitfalls—too little time wastes potent actives, too much time risks irritation.
What Should You Apply After a Face Mask?

Post-mask, balance pH with a gentle toner, then layer a targeted serum or ampoule. Finish with moisturizer and, if daytime, SPF. This sequence locks in hydration and maximizes active ingredient synergy for lasting benefits.
Step 1: pH-Balancing Toner
- Why: Restores acid mantle, optimizes skin for product absorption
- Example: Fermented galactomyces toners for brightening and barrier support
Step 2: Targeted Treatment
- Serums/Ampoules: Vitamin C for brightening, niacinamide for barrier repair
- Critical View: Don’t mix too many actives at once—simplify to avoid sensitization
Step 3: Moisturizer
- Occlusive vs. Emollient: Choose based on skin type and season
- Data Point: Studies show ceramide-rich creams reduce TEWL by 30% after masking
Step 4: Sunscreen (Daytime Only)
- Minimum SPF 30: Protect newly treated skin from UV-induced damage
- Tip: Mineral sunscreens (zinc oxide) soothe post-mask sensitivity
Locking in your mask’s benefits is just as vital as the mask application itself—skip this step and you squander your skin’s readiness for nourishment.
Common Mistakes to Avoid?
Avoid overuse, patch-test new formulations, and never apply masks to actively broken skin. Over-exfoliating masks can weaken your barrier, while mixing incompatible actives (e.g., retinol + strong acids) may trigger redness or peeling.
Overuse & Frequency
- Myth vs. Fact: More masking ≠ better results; 1–3× weekly is ideal
- Skin Recovery: Barrier needs downtime between treatments
Patch Testing
- How: Apply a small dab on inner forearm 24 hours before full use
- Why: Prevents full-face reactions to new ingredients
Ingredient Incompatibilities
- Red Flags: Do not combine high-dose AHAs/BHAs with retinoids in one session
- Best Practice: Reserve exfoliating masks for separate days from retinoid use
Improper Removal Techniques
- Rubbing or Scrubbing: Can micro-tear skin—use gentle fingertip movements
- Hot Water: Overly hot rinses strip oils and exacerbate dryness
Ignoring Expiry Dates
- Shelf Life: Masks often expire 6–12 months after opening
- Tip: Store in cool, dark place to extend potency
A little caution goes a long way: by steering clear of these missteps, you’ll safeguard your skin’s barrier and ensure every mask session delivers safe, visible results.
Conclusion
Whether you need a hydrating sheet mask, a deep-cleansing clay treatment, or a soothing gel formula, Zerun Cosmetic Factory has the expertise to craft your ideal face mask—complete with bespoke ingredients, packaging, and your own logo.
Contact Zerun today for a free design consultation and sample.